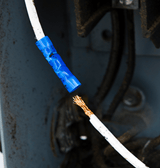
One of the best ways to avoid electrical issues is to properly crimp electrical terminals. Did you know that it’s estimated that almost 60% of unplanned maintenance is related to electrical failure? When your terminals are crimped properly, you can help rule out that possibility and get to the root of the problem faster.
 Almost 80% of electrical wiring failures occur at the point of termination (or where there is a connection), so a proper crimp is a critical element in a wire termination. Here’s how to get the job done right:
- Select the right terminal for the application and wire size.
- There are different terminals for different applications. For example, for an electrical job in an area that experiences a lot of vibration or movement, use a ring terminal instead of a spade terminal. If the attachment screw securing the terminal loosens due to vibration, the spade terminal will disengage while the ring terminal should stay in place.
- Strip the wire to the correct length.
- Strip enough of the wire insulation so roughly 1/32” of the wire can be seen extending from the end of the terminal barrel. You can use a strip gun to make this process fast and easy.
- Select the appropriate crimping tool for the type of terminal to be used.
- Crimping tools fall into a broad range of quality and cost. A cheap crimper often has thin crimp jaws that will bend and deflect under pressure. When a cheap crimper deflects or makes an offset crimp, there won't be enough pressure at the crimp point.
- Common types of crimping tools are the Ratcheting Crimp Tool, the Ratcheting Crimp Tool for Seal Terminals, Cable Terminal Crimp Tools, and your standard Crimping, Stripping, and Cutting Tool.
- Crimping tools fall into a broad range of quality and cost. A cheap crimper often has thin crimp jaws that will bend and deflect under pressure. When a cheap crimper deflects or makes an offset crimp, there won't be enough pressure at the crimp point.
- Select the proper crimp “nest” for the terminal and wire size used.

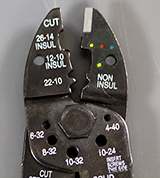
- On each crimping tool, there are "nests" or pockets designed for the electrical terminal to be placed in. Each "nest" is specific to the terminal gauge size and color, ie. 22-18 gauge (red), 16-14 gauge (blue), and 12-10 gauge (yellow). The crimping tool is clearly marked with these colors and numbers to help you identify which “nest” to use.
- Crimp the terminal.
- Make sure the terminal is properly placed in the crimping tool. The correct way to crimp is with the tongue level to the crimp nest.

- Note: If you have a nylon terminal you will need to crimp the terminal twice. The first crimp closes the Insulock grip sleeve onto the wire insulation, preventing wire pull-out, and the second crimp secures the barrel of the terminal onto the wire strands to conduct the power.
- Make sure the terminal is properly placed in the crimping tool. The correct way to crimp is with the tongue level to the crimp nest.
By selecting the right terminal for the application, correctly crimping it, and installing it properly, you can have a reliable, safe electrical connection.
.png?width=131&height=58&name=image%20(40).png)
