.png?width=131&height=58&name=image%20(40).png "Kimball Midwest Slant Logo")

When it comes to cutting tools, let’s face it. Things break. Sometimes it is a problem with the cutting tool itself, but many times, it can be user error.
No one means to break the tool, but doing things quickly can often be the culprit.
While we are sure no one in your shop would do anything like bore a hole wider with the same drill bit they just used – instead of either grabbing a larger drill bit or a step reamer in an effort to save time – that is one of the easier ways to break a sometimes very expensive piece of equipment.
So here are a few things to look for when it comes to broken drill bits.
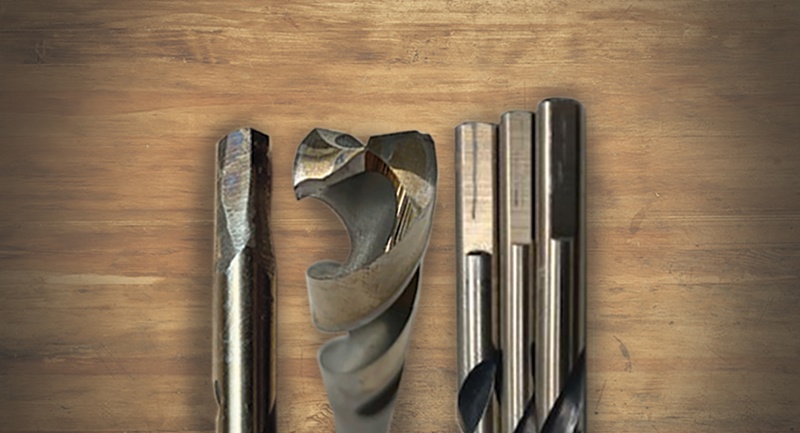
Problem No. 1: Chipped Cutting Lips and/or Broken Tip
Root cause: This is usually due to using the drill bit to enlarge an existing hole. Drill bits are not intended to be used to enlarge holes, as the cutting lips will touch the sharp edges of the hole and can tear out chips at the intersection points.
Instead, try using a reamer, a frame drill or a step drill bit if you are unsure of the size you need to begin with.
Problem No. 2: Broken Through the Flutes
Root cause: This happens when the bit seizes in a hole. You can tell a bit seized by impact marks on the shanks. On both round shanks and shanks with flats, impact marks occur when the drill bit seizes in the workpiece, most often during hole enlargement, but also from jamming the drill through the piece too quickly, causing the drill bit to come to an abrupt stop when the drill motor is still turning.
Our advice is to use a more controlled feed and look for long chip lengths to ensure proper pressure is being used, and never use a drill bit to enlarge a hole.
Problem No. 3: Blue Discoloration or “Bluing”
Root cause: Blue discoloration represents heat damage that could result from using the drill bit at a high RPM, forcing the drill bit into the workpiece or using the drill bit without lubrication. This could also be due to the type of material being drilled, where another material drill bit, like cobalt or carbide, may be required.
To help prevent this, try using a slower speed and cutting fluid to keep the drill bits cool.
Problem No. 4: Bent Shank
Root cause: A bent shank would suggest one of three things:
- the drill motor was dropped with the drill bit in it,
- the drill was torqued sideways during use or
- the material was too hard to be drilled with this bit.
A drill bit’s shank is not heat treated like the drill’s fluted area, which makes it softer and weaker than the rest of the drill and prone to damage if it is being misused.
Solution: This means it’s best to keep the drill straight while drilling into the workpiece. You can also investigate different types of drill bits that might be better suited for the job you are trying to complete.
Of course, things do happen, and all Kimball Midwest cutting tools carry a 30-day limited warranty against defects in material or workmanship. (Note this warranty does not cover damage due to misuse, among other things.)
So, if you want to make sure you can the right tool for the job, let us know and we can help you